1 - Choose to Edit Your Referral Program Page
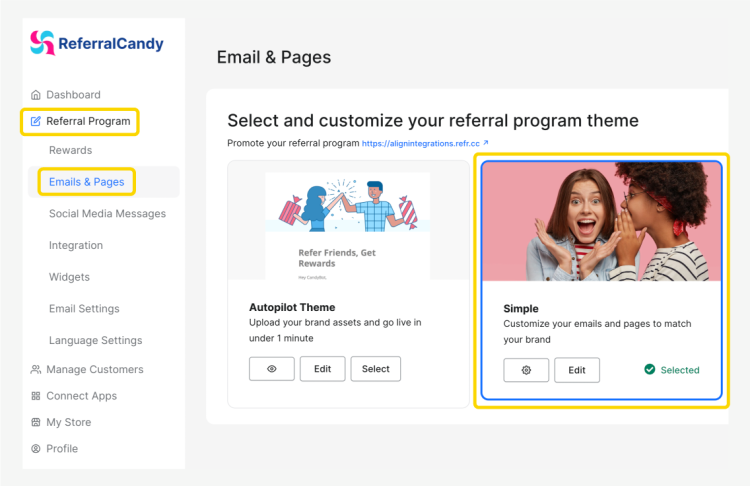
Start by selecting the campaign you’d like to add a Contact Picker to.
You’re minutes away from improving the performance of your ReferralCandy campaigns!

Start by selecting the campaign you’d like to add a Contact Picker to.
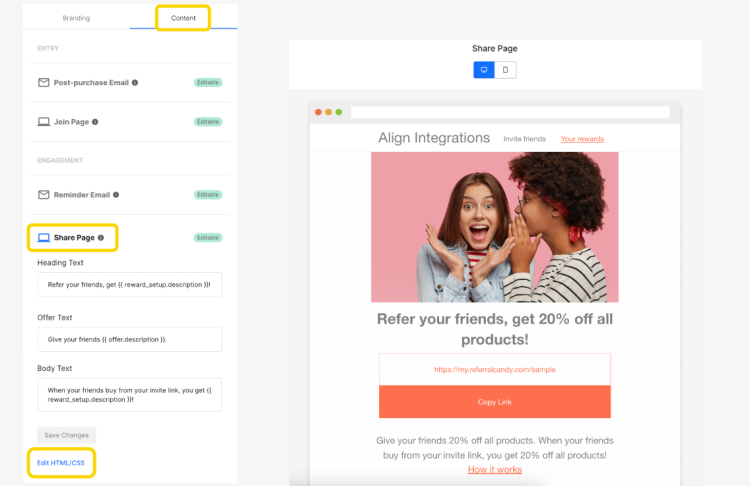
Once inside the campaign setup, switch to the ‘Content’ tab and select ‘Edit HTML/CSS’ under the ‘Share Page’ options.
You will need an icon to add the CloudSponge Contact Picker as one of the sharing options on your share page.
You can use any email icon that you prefer. Or grab the one we used for this installation guide.
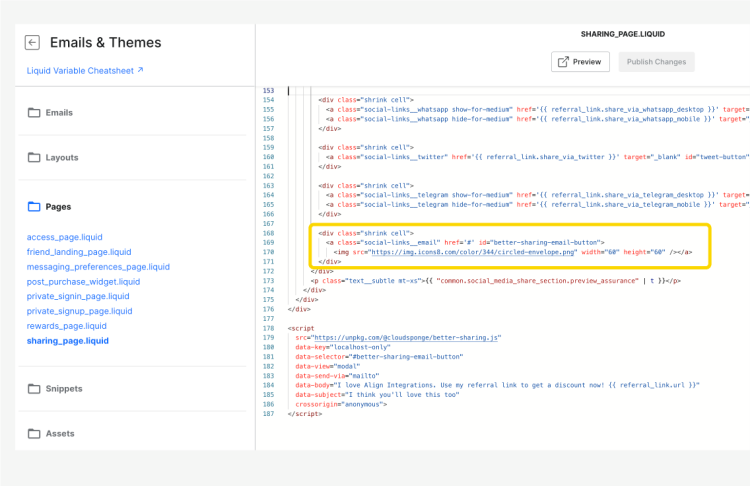
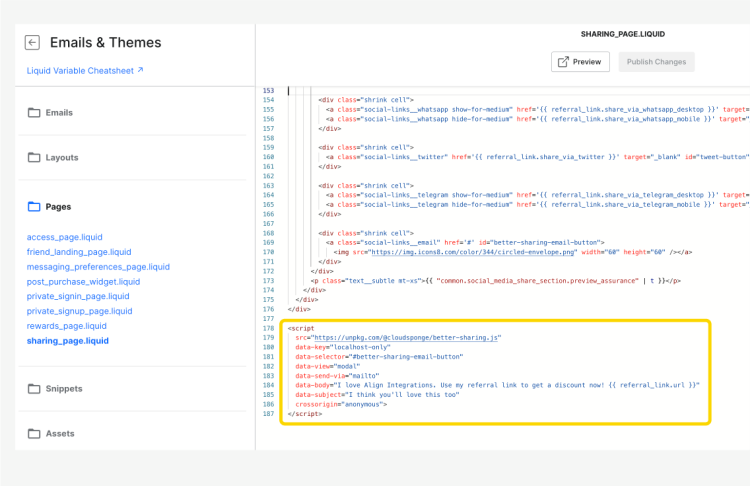
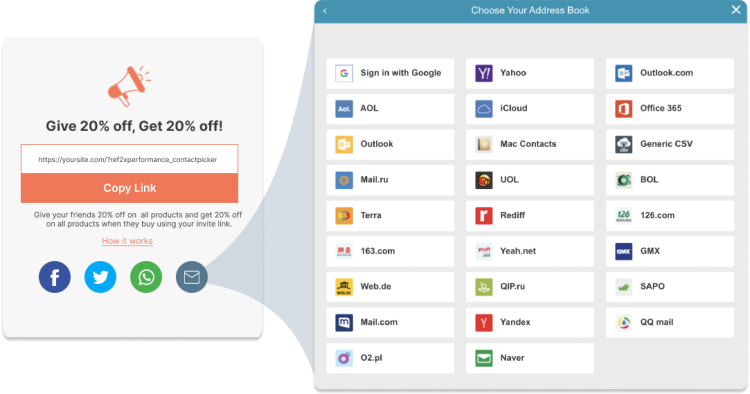
Your CloudSponge Contact Picker installation should be now complete. Test it by clicking the ‘Email’ icon on your published referral page or preview.

Your CloudSponge Contact Picker is ready for use.
In its current setup – the Contact Picker will send out emails using your pre-existing Mailto settings. If you’d like to use Zapier, or another email protocol, instead – see our playlist.
